750 grammes
Tous nos blogs cuisine Suivre ce blog Administration + Créer mon blog

Macaronette et Cie - English version

17 mai 2014

Homemade marzipan

I am sure you know what marzipan is, the smooth candy made from ground almonds, sugar or honey and usually egg white. Marzipan is used notably for cake decoration, sweets making or even baking. Marzipan is rarely homemade but you may decide to do it yourself after discovering how homemade marzipan is the easiest thing to make.

I don't know about you, but I often decide on a whim to make a cake or a dessert, sometimes with a clear idea of what I intend to make or without any idea at all... It happens that my desire of making a cake comes suddenly on a Sunday or a holiday, of course when all shops are closed. It would not be fun otherwise !

The problem in such case is that sometimes my cupboard does not contain the ingredients which exactly match with what I need for the intended recipe… of course, I run out of the main ingredients. For a couple of minutes, I rant on the missing ingredient as my desire of making that specific cake and nothing else, is huge. Then I must find a way to make it no matter what and how!

So the day I needed marzipan and ran out of it, I decided to make my own homemade marzipan.

Well, it is not the first time I am making homemade marzipan, I already gave a recipe of uncooked marzipan with the Easter Simnel cake recipe, which I used as a topping.
This previous marzipan recipe is made from egg white. It is a good and tasty recipe, but as made with uncooked egg white it cannot be kept for a long period (at the most 1 week in a box in the fridge).

This time, I propose a cooked marzipan recipe, made from syrup. This marzipan has several advantages compared to the previous recipe made from egg white: it can be kept longer (at least 2 months in a box in the fridge), it is stickier and does not dry as quickly as the one made from egg white, and it is bacteriologically safer (no risk of salmonella or bacteria development), and the most important, it tastes really good and has a lovely smooth texture and light almond taste. 

This recipe is easy to make and quite quick. You just have to make a syrup with all the ingredients and then mix it with the ground almonds.

As for any marzipan recipe, the most important is the quality of the almonds which have to be really tasty (grounded or not, as you can also ground them yourself).

This recipe comes from a French cookbook dedicated to chocolate called the “Encyclopédie du Chocolat”, all you need to know about chocolate is contained in this book (comparable to the “Ultimate Encyclopedia of Chocolate” – Smithmark Pub - an English dedicated book to chocolate).

For the syrup you will need: sugar, honey and glucose syrup.

Glucose syrup is a food syrup made from the hydrolysis of starch (usually corn starch or other starch crops such as potatoes). It is a thick, colourless and tasteless syrup, used in pastry and sweet confection to soften texture, prevent crystallization of sugar and avoid drying up of the product.

You can find glucose syrup in pastry shops and on internet. It is easier to find in UK or US, than in France where it is reserved to profesionnal shops.

What to do if you do not find glucose syrup ? Well, you can do this recipe without by replacing the glucose syrup by honey, but your marzipan will dry a little quicker.

You can use this homemade marzipan for filling chocolates, making imitations of fruits and vegetables, covering cakes… but also for baking cake, and simply be used for decoration, as I show above by making a rose flower. Of course, you can simply eat it as such.
           

Homemade marzipan
        

For around 700 g homemade marzipan

Ingredients

40 g acacia honey
20 g glucose syrup
9 cl water
180 g sugar
400 g white ground almonds

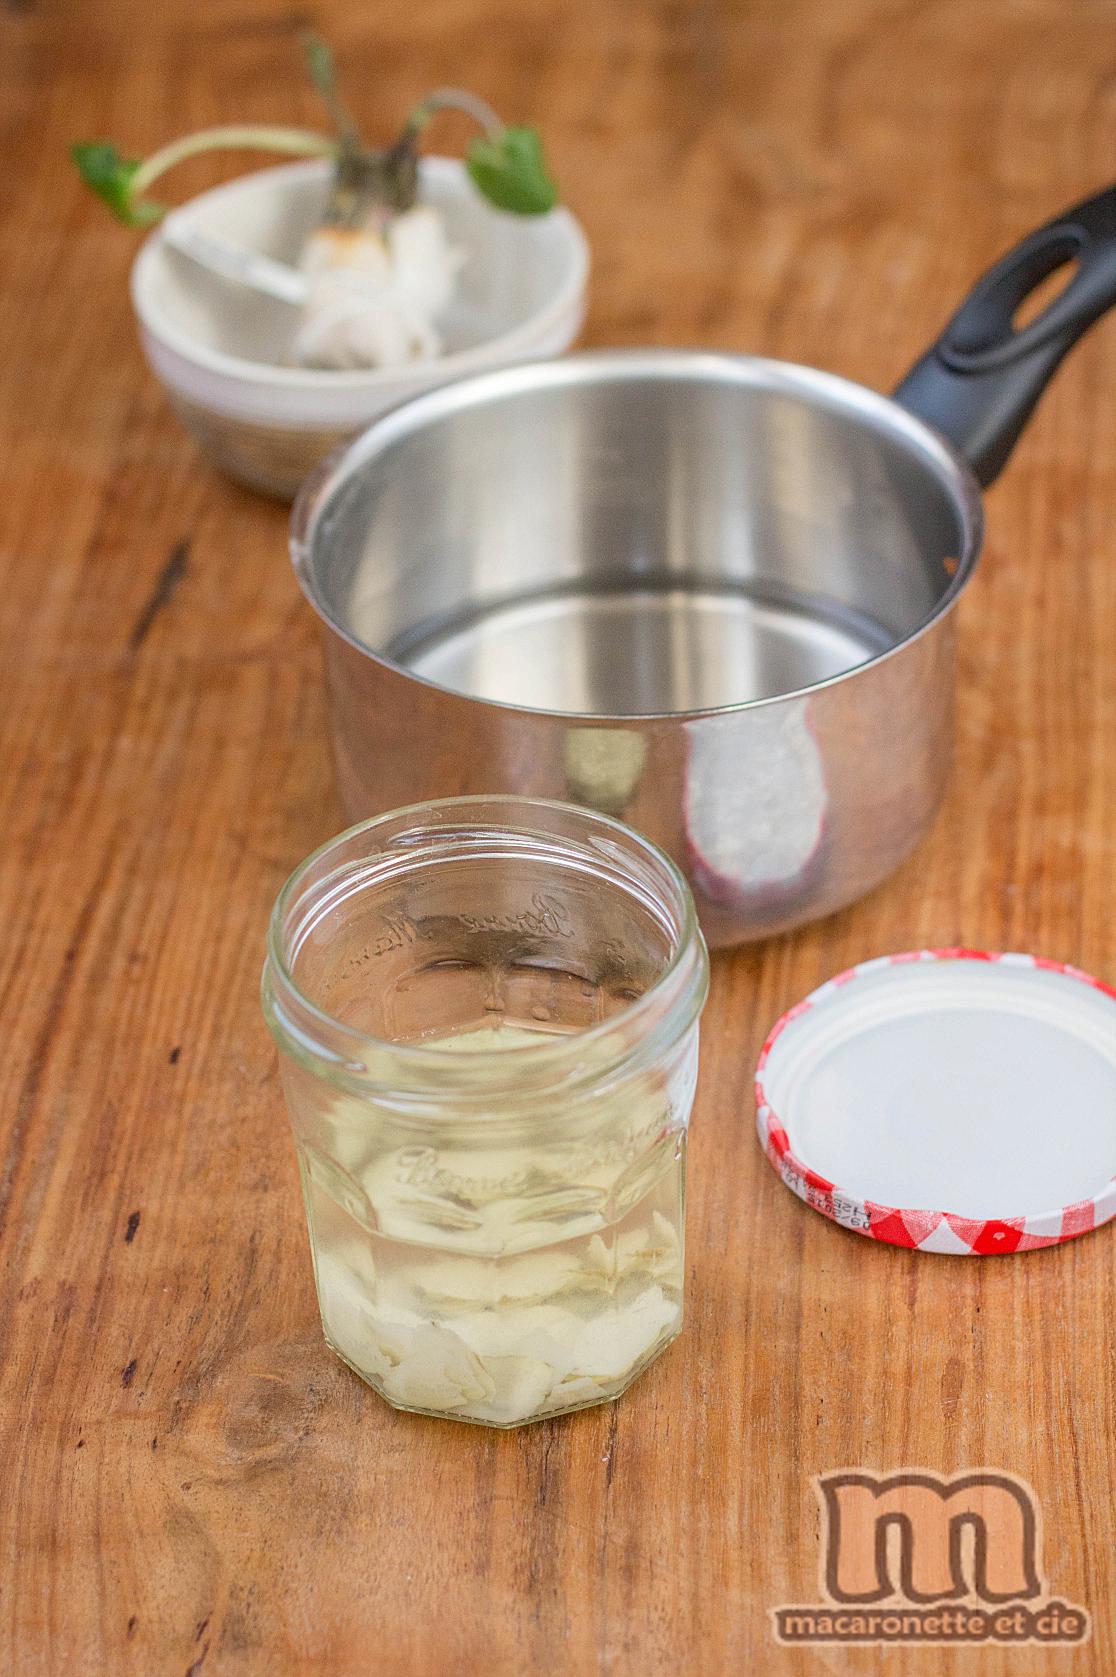
In a saucepan, bring to simmer the honey, glucose syrup, water and sugar until sugar has dissolved.
The syrup should reach about 116˚C.

Mix the ground almond and pour the hot syrup, and keep mixing until having a smooth mixture.


The mixture will remain doughy and sticky while warm.
Dust a marble with confectioners’ sugar and knead until smooth and cooled down.


Put in a plastic box or cover with a plastic wrap and keep in fridge.
Your homemade marzipan is ready to use (or eat :o))
You can keep it for 2 months in the fridge.


Marzipan rose flower
     

This method can be used for making rose with sugar paste.

To color the marzipan, I use gel color, but you can also use powder color.
But avoid liquid color as it will stick the marzipan.


Lay down the marzipan using confectioners’ sugar and cut circle pieces of marzipan.
To detail the example I used 2 colors for the petals.

For creating the centre of your rose : 2 methods

1) with the first petal curl from one side to the other (this is my prefered method)
2) or with a marzipan cone.

Take your next petal and place it, on the seam of the central petal.
As you secure that petal all the way round, you will see the top of it is higher than the central petal.
Repeat with all the other petals (around 6 or 8 petals)

When all the petals are in place give them a little pinch to make a petal shape.

Do not hesitate to leave a comment,
or like on FB or twitter if you enjoy this post.


Sorry for my English, which may be not proper, I am not a English native and do my best to translate or adapt my French post to help non French speaker/readers who follows my blog.


Click on the flag to come back to the French version


Contrat Creative Commons All texts and photos on this blog are the property of Macaronette et Cie (or Sbc).

Publicité
Publicité
9 mai 2014

Breizh panna cotta and buckwheat Triskelion biscuits

For English speaker "Breizh" does not mean anything, but for a Breton (a French person from Brittany) it simply means "Breton" in the local patois. So here comes the second question : what is the link between Breizh (i.e. Breton) and panna cotta, as panna cotta is a typical Italian dessert ?

Panna cotta has really nothing to do with Brittany, that's true ! But it does not mean that you cannot be creative.

The idea of this Breizh panna cotta recipe came to me from an appertiser tasted in one of my favorite restaurant of the Finistère (the peninsula of the west part of Brittany), namely "L'Auberge des Glazicks" owned by the famous French Chef, Olivier Bellin. Olivier Bellin won its second Michelin Star in 2010 and in 2012 he was listed as one of the 158 best chef in the world.

It is not the first time, I eated at his restaurant, and it is always a great culinary pleasure and tasty experience, as he perfectly knows how to make outstanding and sublime dishes and a contemporary French cuisine with Brittany produce such as lobsters, oysters, pork, buckwheat...
His restaurant is located at Plomodiern with a great view on the countryside and the sea. If you are visiting the area, it is an adress which should not be missed out, or a good excuse to visit the area.

I really wonder what the Guide Michelin is wating for by not giving him a third star ? He really deserves it, on my opinion.

Having saying that, Olivier Bellin's panna cotta was a salty one : buckwheat panna cotta, red beet espuma and orange zest. So delicious !

This part of Brittany is also popular for its strawberries : the famous "gariguette". On my way back from vacations, I brought some local strawberries back home which inspire me a sugar version of buckwheat panna cotta. I must admit that I have a sweet tooth.

With regard to buckwheat, I am sure you recognize my buckwheat Triskelion biscuits from my previous post.

For this buckwheat panna cotta, my first try was not that good as I cooked the buckwheat directly with the cream, which resulted in a creamy dessert instead of a really panna cotta. It was a dissapointment !
So for the second test which is the above recipe, I used a recipe I found in a French magazine called "Saveurs". The taste of buckwheat is not as strong as I expected, but the texture is just perfect.

At the end, it was a nice dessert.
           

Breizh panna cotta

         
and buckwheat Triskelion biscuits
       

For 4 to 6 servings

Ingredients

40 cl double cream
20 cl milk
20 g buckwheat flour
3 gelative leaves
20 g sugar

200 g fresh strawberries
4 tsp of red fruit coulis

Buckwheat Triskelion biscuits

Bring the milk to simmer, stop heating and pour the buckwheat flour in.
Leave to brew until the milk is totally cold.
Then filter the milk.

Soak the gelatine leaves in cold water until soft.
Squeeze the water out of the gelatine leaves, then add to the pan and take off the heat.
Stir until the gelatine has dissolved.
Add the buckwheat flavour milk in and mix.

Divide the mixture among the ramekins and leave to cool.
Place into the fridge for at least an hour, until set.

Wash and dry the strawberries, keep some for decoration.
Cut the other in small cubes.

On each panna cotta, pour some red fruit coulis, and divide the strawberries cubes among the ramekins.
Decorate with strawberry and trsikelion biscuits.


Do not hesitate to leave a comment,
or like on FB or twitter if you enjoy this post.


Sorry for my English, which may be not proper, I am not a English native and do my best to translate or adapt my French post to help non French speaker/readers who follows my blog.


Click on the flag to come back to the French version


Contrat Creative Commons All texts and photos on this blog are the property of Macaronette et Cie (or Sbc).


4 mai 2014

Buckwheat flour Triskelion biscuits

After a couple of holidays in Britany (West of France, but most of English people know where Britany is), I wanted to extend the holiday atmosphere at home, by cooking some biscuits with the flour brought from the far west part of France, that is to say : buckwheat flour.

Buckwheat is one of the culinary emblems of the Breton cuisine mainly through the traditional buckwheat pancakes, but also the "kig-ha-farz", the "groux" (a kind of porridge), the "pouloud" (buckwheat balls cooked in milk)... and more generally any recipe of "farz".
Today a lot of other recipes are made from buckwheat flour, such as Breton "galette", bread (then associated with another cereal)...

It is not uncommon in summer to see some buckwheat fields in the countryside of Britany, although rarer then wheat or corn fields.

In Britany, originally, buckwheat was the wheat of poor people. It is said that buckwheat was created by the Devil, as it is black (in French buckwheat is also called "black wheat"), whereas wheat was created by God, as it is white. A lot of legends exist in Britany about buckwheat.
In organic shop, it is common to find buckwheat groat, which is cooked like rice. Its taste is stronger than rice.

Despite the name, buckwheat is not related to wheat. Buckwheat is a genus in the polygonaceae family, such as sorrel and rhubarb. As not a wheat, buckwheat contains no gluten.

Its flower is white with some light pink color, and is a good honey plant, producing a dark, strong honey. 

As time goes by seeds are appearing, which are called achene, having a three angles form. Each only contains a single seed inside a hard outer hull.
The stem are red color. Such stem are not good for hay and straw to feed farm animals, as it is toxic stem.


In France, the other name of buckwheat is sarrasin, as a lot of people found it was coming from the Middle East, as it was introduced by the crusaders, but this is wrong as its origin is North Asia.

Buckwheat is used not only in Breton cuisine, but also in Japanese's one with notably soba, or Russian, Polish and Jewish cuisine where buckwheat groat are cooked like rice, where buckwheat is respectively called "Гречи́ха" (grechikha), "каша" (Kasha) and "קאַשי".

Originaly I wanted to make some buckwheat biscuit, as in the recipe of Saveur Passion, which is a good one, as shown in the hereafter photo, but the form was not appropriate for the dessert I intended to make... and that will be the subject of a next post.


So, I wanted to have some triskelion form biscuit with a crunchy texture.

Therefore I accomodatde a little bite the original recipe to make a crunchy version as I expected. This recipe was born.

For the whole dessert, you will have to wait a little more...
        

Buckwheat Triskelion biscuits
        

For 50 biscuits

Ingredients

50 g melted butter
120 g buckwheat flour
50 g brown sugar
50 g honey
25 g egg white
1 pinch of salt

Mix together the melted butter, the buckwheat flour, salt, honey, brown sugar and white egg.
Put it in the fridge for 1/2 hour.

Preheat the oven at 190 °C.

Fill a pastry bag with dough with a hole of around 0.3 cm.
If the dough is too hard let it cools at the room temperature.
The dough shall soft enough to get out of the pastry bag just by squeezing.
Form the triskelion biscuit on a bakig sheet (at the end of the post I attached the triskelion size).

Let cook for 5 - 6 minutes,
and cool completely on wire rack.


Triskelion biscuit size : triskel

Do not hesitate to leave a comment,
or like on FB or twitter if you enjoy this post.


Sorry for my English, which may be not proper, I am not a English native and do my best to translate or adapt my French post to help non French speaker/readers who follows my blog.


Click on the flag to come back to the French version


Contrat Creative Commons All texts and photos on this blog are the property of Macaronette et Cie (or Sbc).


1 mai 2014

Dandelion and lemon jelly

On 1st of May, I should be talking about lily of the Valley (as in France, the tradition is to offer lily of the Valley as lucky-charm) ... but considering the grey sky we have today in France, I prefer to talk about another flower which is more sunny.

On the web, I sometimes make some wonderful discoveries, have amazing surprises... which offers the opportunity to have a nice walk in the countryside or simply have fun in the garden. The younger ones will have fun picking flowers during the walk and the older will delight the taste of the jelly made of it.

I stumbled upon a recipe of dandelion and lemon jelly... First, I was intrigued, but as in France we eat young dandelion leaves in salads in the springtime, why not a jelly with the flowers ?

In Franche Comté, this jelly has nothing amazing, since there is a specialty called “cramaillote” from the old franc-comtois word "
cramaillot" meaning dandelion. This flowers jelly is generally made in the springtime when the 1st dandelion flowers of the year appears in the fields, green spaces, and gardens...

Finally Dandelion is not only the invasive plant of our gardens, it is also, but we tend to forget it, a medicinal plant as shown by its Latin name of
Taraxacum officinale. In medicine, it is mainly used to treat liver and gallbladder aches. They also lend virtues against sore throat, anemia, fever, fluid retention...
In French language, Dandelion is called “pissenlit” which is associated with its diuretic properties... as we tell children, it is to "wet your bed”  (“pisse au lit”) if you play to much with dandelion flowers... sometime even French may have strange idea when putting name on things !

Through the recipes found on the web there are 2 schools emerging, and I will not indicate which one is the better as I did not follow one in whole:

-
Whole flowers or petals only? 2 schools, one snip off the base of dandelion to keep just the yellow petals, the other removes the milky stems at the base of the flower (anyway don't add any part of the milky stem to avoid a bitter taste in the jelly)
-
Dry under the sun or not the flowers after washing? Again two schools, one saying that when dried under the sun, the jelly tastes like hay ... (I would not disagree on that particular matter and only dry it as I use to do with lettuce)
-
Granulated sugar, jelling sugar ....? No opinion, I used agar-agar and a mixture of 2 kinds of sugar... but the traditional method uses only granulated sugar
-
With citrus juice or only water ? For me, it is with lemon for the yellow ! But it is as you like it.

Well, as usual feel free to make up your own mind and your own taste.

Here, I used the recipe given by Marie Chioca but adapted it to my own way of doing... It is far from the traditional “cramaillote”, so I will talk about flower jelly.

Obviously, do not pick up flowers anywhere if you want to try this very tasty jelly : avoid flowers of the roadsides, fields which are nearby pesticide treated fields...

Finally, a very nice recipe that reconciles me with dandelion... I must admit that I regularly complain"ed" that my garden is overgrown with dandelion and usually sends my “
Lutines” to collect the small yellow flowers to avoid proliferation ... Now I will look differently at my dandelions and will enoy them every spring in jelly.

It seems that it is also possible to make dandelion wine ... that may be a next experience.
           

Dandelion and lemon jelly
       

For one or two jam pot (depending on size)

Ingredients

40 g dandelion flowers or petals
500 ml water
1 organic lemon
2 g agar-agar
1 vanilla bean
50 ml agave syrup
80 g sugar

Rince and spin-dry the dandelion flowers (like you would do with a lettuce).

In a pan, put the flowers with water, the vanilla bean cut into 2 pieces and seeds scratched, the lemon zest and juice.
Bring to simmer for 10 minutes at low heat.

 Strain through a coffee filter or or jelly bag to remove all petals, vanilla bean and lemon zest.
Put the juice back in the pan, add the sugar, the agave syrup and bring to simmer for 5 minutes at low heat.
Then sprinkle the agar-agar powder over the juice and simmer for another 3 minutes.

Pour the hot jelly in jelly jars.
Close and return the jars to cool.

When open, the jelly will be kept in the fridge and to consume up to 15 days
(as it is not a pure sugar jelly).


Another style of photo
Originally I considered the following photo to be quite poor, as it is blurry and overexposed...
after passing it through lightroom... I finally like it to share.


Do not hesitate to leave a comment,
or like on FB or twitter if you enjoy this post.


Sorry for my English, which may be not proper, I am not a English native and do my best to translate or adapt my French post to help non French speaker/readers who follows my blog.


Click on the flag to come back to the French version


Contrat Creative Commons All texts and photos on this blog are the property of Macaronette et Cie (or Sbc).

28 avril 2014

Black sesame pancakes

You may know that I love asiatic flavour, especially Japanese one... and at home pancakes are usual for our breakfast or for the kids when coming back from school. Two good reasons to taste pancakes flavored with black sesame paste.

Black sesame paste is a paste made of black sesame seeds which have been toasted to increase their taste. It can also be made with white sesame seeds, you should then not confuse Asian sesame paste with tahini (which is a speciality of the  Middle Eastern also made with sesame seed). They are not similar at all.
The taste of black sesame paste is strong but refined. The jars are small but you do not need to put too much of the paste in the preparation for having a good taste of it. It is quiet concentrate.

In Japanese pastry, black sesame paste is commonly used in desserts like chiffon cake, mochi... and ice creams... and the black sesame paste can be spread on pancake or toasts.
It can also be used for salty preparation, like fish dishes.

I found fun to add black sesame paste to my pancake dough, as this paste gives a unusual black color to the pancake, and amazing color to eat.

We eat the black pancake with a yuzu marmelade, put it can come with any marmelade (orange, lemon...)
         

Black sesame pancakes
      

For 8-10 pancakes

Ingredients :

150 gr wheatflour
4 tbsp sugar
1 teasp baking powder
2 tbsp black sesame paste
1 egg + 1 white
25 cl milk
1 tbsp rapeseed oil (or any unflavored oil)
1 pinch of salt

In a bowl, combine the flour, sugar and baking powder.

In another bowl, mix the egg, milk and oil, then gradually add the liquides to the dry ingredients.

Add the black sesame paste and mix.

Whisk the egg white until stiff with the pinch of salt, and incorporated it in the mixture
With a spatula, fold in the egg whites until just incorporated.

Heat a frying pan over medium heat and brush it with butter.
Using 1/4 cup mixture per pancake, cook pancake for 3 to 4 minutes or until bubbles appear on surface.
Turn and cook for 3 minutes or until cooked through. 

Repeat with remaining mixture, brushing pan with butter between batches.

Serve.

Do not hesitate to leave a comment,
or like on FB or twitter if you enjoy this post.


Sorry for my English, which may be not proper, I am not a English native and do my best to translate or adapt my French post to help non French speaker/readers who follows my blog.


Click on the flag to come back to the French version


Contrat Creative Commons All texts and photos on this blog are the property of Macaronette et Cie (or Sbc).


Publicité
Publicité
3 mars 2014

Wasabi Liquor

This is the 4th and last post related to fresh wasabi.


In this post, the recipe is an experience of making alcohol having wasabi flavor with fresh wasabi.


It tooks me about 4 weeks before the finalization of this liquor, which is quite amazing. I am not sure it could be made with wasabi paste or powder, however if you find some fresh wasabi and like the taste of it, just try it as it is a good tasty surprise.


This liquor clearly smells wasabi, and taste strong but without the aggressive hot sensation that wasabi can give.


Should be consumed with moderation, as it is still alcohol after all.       


Wasabi Liquor


Ingredients


12,5 cl spirit with a neutral taste
15 g fresh wasabi
60 g sugar
13 cl water


Wash, dry and cut into shaving the wasabi, and pour it into a glass jar with the alcohol.

Screw the lid on tightly and store the jar in a cool, dark place for 20 days or more.

After 20 days or more,
bring water and sugar to the boil, up to the sugar is completely dissolved and the liquid has a syrup-like consistency.
It should take 2-3 minutes boiling.

Let it cool completely.


Filter through the alcohol with the wasabi to remove the wasabi pieces
and pour the alcohol in the cold syrup.
Pour it into a glass bottle.

It can be stored for months.


Do not hesitate to leave a comment,
or like on FB or twitter if you enjoy this post.


Sorry for my English, which may be not proper, I am not a English native and do my best to translate or adapt my French post to help non French speaker/readers who follows my blog.


Click on the flag to come back to the French version


Contrat Creative Commons All texts and photos on this blog are the property of Macaronette et Cie (or Sbc).

15 mai 2010

Linseed and orange biscuits

Here comes some nice little biscuits that I originally made to come with an India dessert. They are also very good with tea or coffee.
The idea of mixing linseeds and orange came from some biscuits I bought in an organic shop with a mix of flavor from orange biscuits that I bought at my work place.
I like to eat some of those biscuits for breakfast, doing like French use to do with croissant: dipping it into the hot coffee.


Linseed and orange biscuits
 

Ingredients:

300 gr / 10.5 oz flour
1 tablespoon baking powder
125 gr / 4.5 oz softened butter
100 gr / 3.5 oz sugar
1 egg
1 egg yolk
half an orange juice
1 orange peel
40 gr / 1.5 oz linseeds

Preheat the oven to 180°C.
Sift together the flour and baking powder, and add the linseed and the orange peel.
Cream sugar and butter and add the egg, the egg yolk and the orange juice
and mixed all together.

Stir the flour mixture into butter mixture until well blended and smooth.
Roll the pastry into sausage form and put it into a plastic film,
And put in the fridge for an hour.

Cut the pastry sausage into biscuits.
And bake for around 10 minutes.


Do not hesitate to leave a comment,
or like on FB or twitter if you enjoy this post.


Sorry for my English, which may be not proper, I am not a English native and do my best to translate or adapt my French post to help non French speaker/readers who follows my blog.


Click on the flag to come back to the French version


Contrat Creative Commons All texts and photos on this blog are the property of Macaronette et Cie (or Sbc).

14 mai 2010

India orange and rose tea

I don't know if you know about Philippe Conticini, who is one of the most fabulous and famous French Pastry chief, and one of my favorite ones.

He creates remarkable pastries and cakes, and here comes a light dessert deriving from one of his recipes. I say deriving because I did not have all the ingredients to make the original one. But I had some nice others that appeal to me. Some flavors which can be perfectly associated.

I wanted to have a light and fresh dessert. Even if the weather looks like winter time actually, I wanted to have some this fresh but warm in flavor, like some Indian dishes.

After tasting : it was what I expected. A real good surprise !

I hope you will enjoy it as we had.


India orange and rose tea


Ingredients:

4 oranges
350 ml orange juice
1 lemon juice
1 tablespoon cornflour
1 tablespoon shredded coconut
1 teablespoons rose tea (or jasmine tea)
1 teaspoons cumin seeds
1 or 2 tablespoons blanched pistachious
1 cinnamon stick
2 tablespoons suggar (optional: there is no suggar in the original recipe)

Peel totally the orange skin and take only the orange pulp
Divide among dessert cups.

Put the orange and lemon juice with the suggar into a saucepan
and bring to simmer.

Add the cornflour to the pan and stir until it thicken like a syrup.
Take off the heat and add the shredded coconut,rose tea,cumin seeds,
cinnamon stick and blanched pistachious (except some of of them which should be kept for decorating)
Leave to cool.

Divide the mixture among dessert cups contaning the orange peels.
Place into the fridge for a couple of hours, until set.

Serve it fresh with little cakes.


Do not hesitate to leave a comment,
or like on FB or twitter if you enjoy this post.


Sorry for my English, which may be not proper, I am not a English native and do my best to translate or adapt my French post to help non French speaker/readers who follows my blog.


Click on the flag to come back to the French version


Contrat Creative Commons All texts and photos on this blog are the property of Macaronette et Cie (or Sbc).

Publicité
Publicité
Macaronette et Cie - English version
Publicité
Archives
Publicité